Guide on how to overclock your monitor
The modern-day users are likely to expect full performance from their PC. If you know how to overclock monitor then your computers work at a higher rate than the manufacturer produces it. If you don't have any idea about it, then this article will guide you.
Overclocking the monitor is making it run at a higher frame rate that it is used to do. It increases the monitor's refresh rate, which means it displays more frames on the screen per second or else buy your new 1440p monitor to increase productivity.
What is the average Refresh rate?
Refresh rate refers to the number of times an image displayed per second on a screen needs to be regenerated to prevent flicker when viewed by the human eye. For example, a monitor with a 60 Hz display will have a refresh rate of 60. This means that images will be displayed 60 times a second.
Likewise for 75 Hz and 144 Hz. The higher the rate, the better it is for gamers. In high-end graphics, a large refresh rate is required. The human brain sees the images at 24 refresh rates, but at the same time it can withstand a higher refresh rate
Will overclocking work for all monitors?
The refresh rate can be increased in most of the monitors. But at times the upgrade of refresh rate also depends on the type monitor. In identical monitors, one can be upgraded while others cannot be upgraded. It depends on the display panel inside the monitor.
When the user buys the monitor, they should look into the display specifications. Sometimes the manufacturer installs the overclock into the monitor, which allows the user to overclock it. But the risk becomes higher if the monitor is not specialized in overclocking and the user decides overclock it.
how to overclock monitor
The process is a very simple and straight forward. The procedure may require a third-party application like CRU, or it can be done internally by NVIDIA, Intel, AMD processor.
CRU stands for Custom Resolution Utility. It is a software used to change the display settings of the monitor. It works well with AMD graphics. The steps to change the refresh rate are as follows.
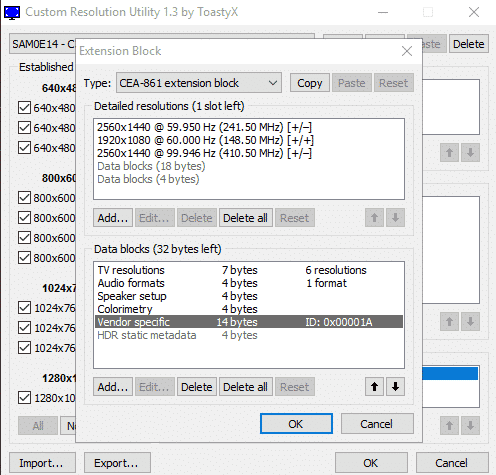
In Windows 10, the process to overclock the monitor is as follows.
This will work. If not, then the monitor will be black for about 15 seconds and revert to the original settings.
The refresh rate can be changed very smoothly in AMD GPU using the AMD Radeon settings. The steps are as follows:
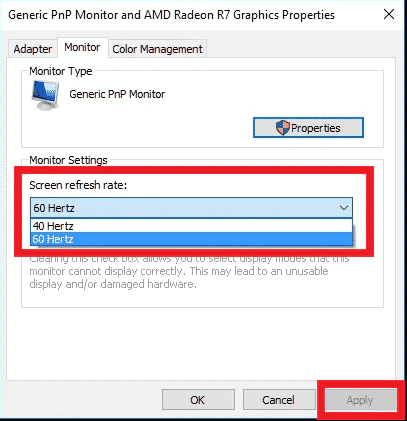
Now rebooting the PC will change the refresh rate of the monitor.
The steps to change the refresh rate in the AMD panel and the NVIDIA panel is quite similar. But the NVIDIA panel is more sophisticated.
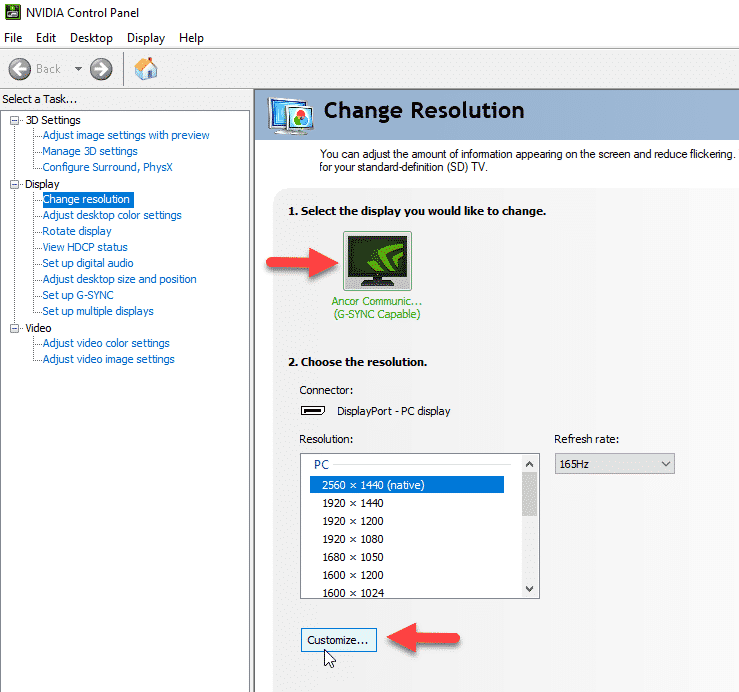
The refresh rate should be changed by the end of the procedure. The monitor will blackout for a second and come back online.
The steps to change the refresh rate using the Intel graphics settings are quite simple. Intel has its control panel, which will help in this procedure. The steps are as follows.
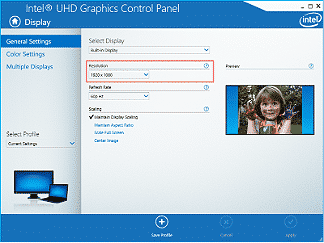
Now reboot the system and get the desired refresh rate. If then also the refresh rate doesn't change, repeat the process.
Conclusion
To check whether the refresh rate is changed or not, there is an online test that can be run by the user. Check out this site.
The steps to run the test will be given on a particular website. It takes a photo of the moving graphics at a slower shutter speed. The result will be a photo of a shaded and black box. If the shaded boxes are in a line and unbroken, the test is successful and the refresh rate has been successfully changed. Otherwise, follow the above steps to change the refresh rate.

